Adventures with Dhanno: Gear & Equipment
This post contains affiliate links. That means that if you make a purchase after clicking on a link I will earn a small commission at no extra cost to you.
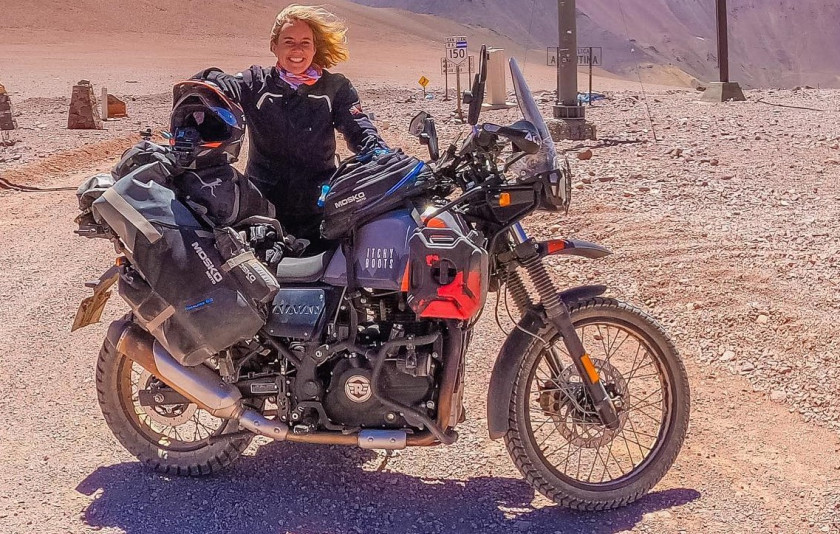
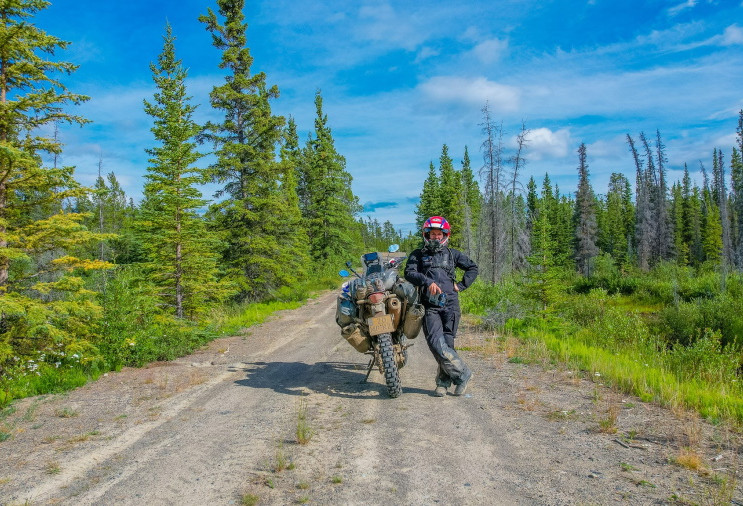
15 October 2019With my Royal Enfield Himalayan “Basanti” I rode for more than 8 months from Asia to Europe (read about the gear I used for that trip here). I used the lessons I learned from that trip to improve the set-up of my new Himalayan “Dhanno”. With her, I will travel from Patagonia to Alaska.
Video and photography
I record all footage for my YouTube channel with the Go Pro Hero 7 Black. At the time of this blog publication, the GoPro Hero 8 has come out, but that was too late for my trip.
The GoPro Hero 7 has state-of-the-art image stabilisation, which allows for stable footage even when you and your motorcycle are flying over bumpy roads. It still amazes me how clear, sharp and stable the imaging is.
This action camera comes with quite a few options to customise the recording to your liking. I normally don't have time to fiddle around with the settings while on the road. I use the ‘auto' function but always record in 4K resolution, at 60 frames per second and with a wide angle. You can check out how the footage of this camera looks on my YouTube channel.
For my Patagonia to Alaska trip, I travel with three GoPro cameras. I just want to be sure I have enough spares in case I manage to loose or damage one of them. Better safe than sorry!
Drone
Near the end of my first trip, I bought a second-hand drone, the DJI Spark. It was my first drone and it was a good one to practise with. The battery life of this drone was only very short (10 minutes) and it didn't record in 4K. As I lost my remote controller for this drone, I decided to buy a new one that would meet all my requirements. So, I bought the DJI Mavic Air for my next trip. This drone is just as compact as the DJI Spark, but can shoot in 4K and has a much longer battery life.
Photocamera
Even though the GoPro camera takes high quality photographs, I carry a separate camera with me for taking even better photographs. On my first trip I had a Canon Powershot G7X Mark II with me. It took great pictures but unfortunately that camera didn't last till the end of my Asia to Europe trip.. So for the Patagonia to Alaska trip I bought a new camera, the Sony Cybershot DSC-RX100 mark IV.
This camera is even more compact than the Canon Powershot and it has better specs too. It also has a built-in wifi function, so I can easily transfer the photos to my phone and upload them on Instagram!

Go Pro accessories
I will take the Smatree batteries and charger again with me again, like I did on my Asia to Europe trip. To improve theaudio quality of my recordings, I bought the GoPro mic adapter and an external microphone to place inside my helmet. Now I can share my thoughts with you while riding.
To accommodate the microphone adapter, I ordered the Ulanzi vlog case. With the vlog case attached to the helmet, and the microphone attached to the GoPro, you can imagine I don't want plug and unplug the entire set up every time I have to change batteries.
That is why I also bought the Go Pro Powerbank. This powerbank allows me to charge my GoPro while I'm recording and I won't have to stop to change the batteries in the middle of a great recording.The GoPro Powerbank stays in the pocket of my jacket and that way I can keep the same setup during a full day of riding!
Go Pro Mounts
Most of the footage I record from the mount on the chin piece of my helmet. On my race helmet it was very easy to stick a standard GoPro mount there. My new helmet doesn't have a flat surface at the chin, so I had to get a bit more creative. I found the Proshot Helmet cam mount which you can attach to your helmet with double sided velcro.
On my first trip, I got creative with the GoPro wrist band mount which I wrapped around my brake fluid compartment on my handle bar. Because I have now installed the double take mirrors, I had to come up with another solution to record from this angle. So I placed a standard GoPro handle bar mount around the center of my handlebar.
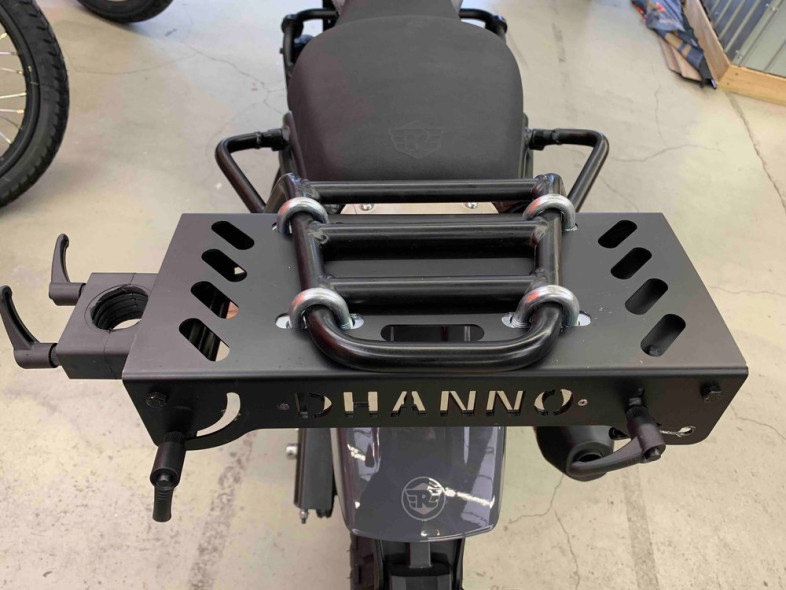
To record from the pillion perspective, I previously placed a GoPro mount on my topbox. But now that I don't ride with a topbox anymore, I had to come up with a different solution. Luckily, Richard from Knook Vormgevers in Metaal, heard of my problem and offered to make a special mount for me. He made me a custom rack with mounts on both sides, so I can attach my GoPro selfie stick on either side of the bike.
Go Pro Selfiestick
The final angle to record while riding is holding a selfie stick with the Go Pro mounted on it. I can't say it's my favourite angle and I don't do it very often. Only on quiet roads I sometimes use the selfie stick to record my motorbike and myself while riding. At the bottom of the GoPro selfie stick, you can unscrew a small tripod. In combination with the timer on the GoPro itself (either 3 or 10 seconds delay), I can use it to take photos with.
Tripod
The problem that every solo traveller faces, at least at some point along the journey, is how to get a great shot when there is nobody around. One can always choose for the selfie option, but to get more dynamic pictures of you and the motorbike in the entire frame, you need a tripod.
The GoPro selfie stick with the small tripod is an option but I prefer to use a high quality tripod with sufficient height to create the perfect angle for an amazing photo. At the beginning of my motorcycle journey, I traveled with a Canon 80D SLR. A great, but relatively heavy camera. This tripod is suitable for those heavier cameras, which is why I chose it. As my focus shifted from photography to making videos, I barely used my 80D any longer. Eventually I decided to send it back to the Netherlands, but I kept the tripod with me.
There is even a special GoPro mount for it, so I can mount both my Go Pro and my Canon Powershot on this tripod.
Riding Gear
Motorcycle clothing company REV'IT! offered me motorcycle clothing for my Patagonia to Alaska adventure trip. Below you can find the gear I chose from their collection for my new adventure.
Jacket & pants
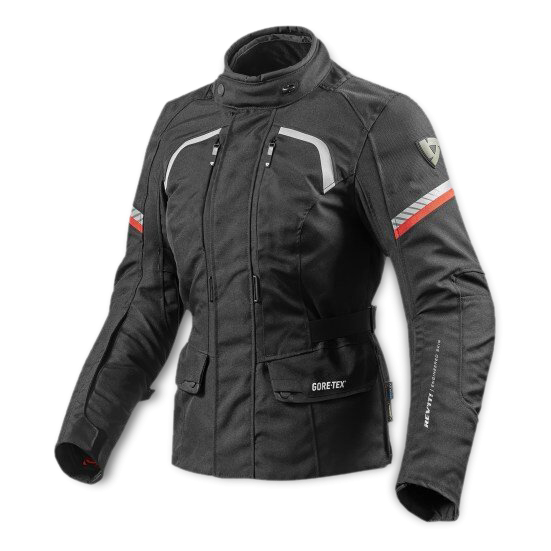
I am wearing the Neptune GTX Ladies motorcycle jacket and pants. Both jacket and pants have a detachable GORE-TEX membrane which is waterproof, and a detachable thermal liner to keep you warm. I chose to remove the thermal liner and have a Jacket Core Ladies instead.
This mid-layer is compact, warm and I can also use it as a jacket when I’m not riding my motorcycle but go for a walk around town during my travels. There are multiple zippers on the jacket which you can unzip when riding in warm climates so you’re able to ventilate while riding.
I’ve used this suit for 15.000 kilometers now, riding through all sorts of weather conditions in South America. It’s kept me warm, dry, and comfortable, while still looking like new!
Boots
During my trip with “Basanti” I went through two pairs of riding boots in just 8 months time. The standard-leather-touring boots are clearly not lasting very long with all the off-roading that I do. The scrambling over rocks and through the mud was too much for them.
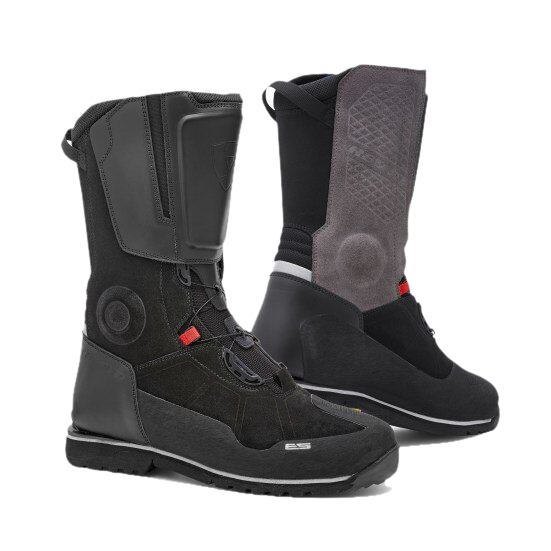
I considered getting some strong motocross boots, but those are very uncomfortable if you have to do some walking. In the end, I decided to take the Discovery H2O boots, which are waterproof, high, and still comfortable to go for a short walk.
I absolutely love the fact that I can now tackle river crossings without getting wet feet. They also protected my leg against a biting dog hanging on to my leg in the mountains of Argentina!
Gloves
On this trip, I am carrying three pairs of gloves with me. I don’t want to ride with heated grips or heated gear (read here why) so I have the Sand 3 Ladies for riding in hot climates, the Drifter 3 H2O Ladies for wet and average climates, and the Taurus GTX for the extreme cold.
On the first 15.000 kilometers through South America, I used all three types of gloves. In cold Patagonia I was using the Taurus GTX, in the hot deserts I was wearing the Sand 3 Ladies, and the Drifter 3 H2O for everything in between. I’ve been especially happy with the Taurus GTX because on this trip my fingers didn’t get cold or wet as they did on my first trip in Tajikistan (when I almost got frostbite in my fingers!).
Base layers
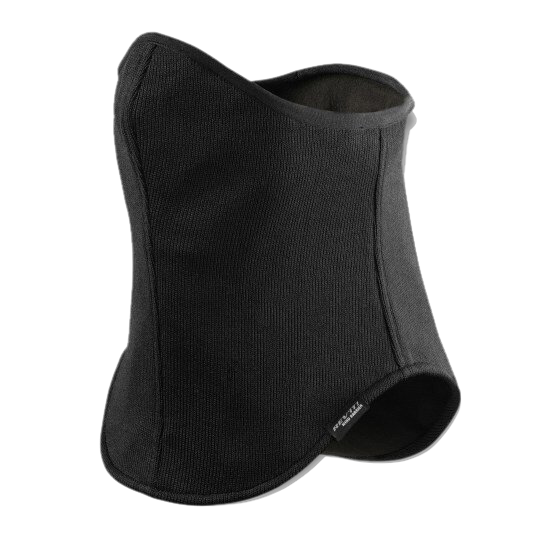
As a base layer, I have the grey Sky LS Ladies shirt with the Sky LL Ladies pants. Depending on the temperature, I either wear long summer or winter socks. To protect me from strong, cold winds, I have the Castor WB Windcollar. I always ride with a bandana covering the lower part of my face, but these don’t protect you against the cold wind. I’ve tested the wind collar and it did exactly what it was designed for. No wind got through and it kept my face nice and warm throughout my ride.
Safety equipment
I love to ride in remote, mountainous areas and explore dirt tracks. This comes with risks. Whether it is a potential bike breakdown or a personal injury, you may find yourself alone and in need of help.
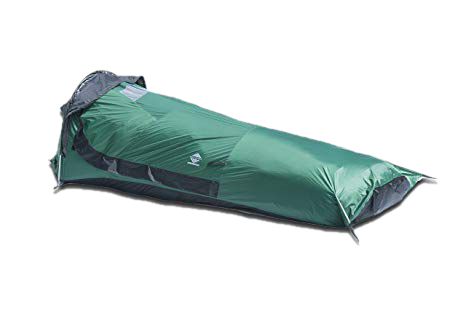
During my motorcycle travels, I stay in guesthouses and do go camping. On my previous trip I didn’t have any sort of tent with me, which can be tricky in case I strand somewhere remote for whatever reason. So for this trip, I decided to bring a light weight emergency shelter with me.
It won’t be comfortable but it doesn’t have to be comfortable. Its only purpose is to provide me with shelter in case I am forced to spend the night on the side of the road.
I travel with a Thuraya XT-LITE satellite phone which I topped up with 50 dollars worth of credit. This allows me to ring any number, local or foreign, whenever I would need help. It’s an expensive device but for me it’s worth the investment. I hope that I’ll never have to use it, but I’m glad I have it with me.
This satellite phone does not have coverage in every single country in the world, so it’s wise to always check upfront if it works in the country you’re traveling in!
Tyre tools
On the first day of my Patagonia to Alaska adventure I already hit a nail in my rear tyre! Sometimes luck just isn’t on your side. For situations like these, I have an air compressor with me. I bought the Rocky Creek MotoPressor Pocket Pump, which is small and a light weight device. I can easily plug it in and connect it to my motorcycle’s battery.
The SAE plug that comes with it, you can install on your motorcycle battery before you start your trip, and in case of a puncture, all you need to do is just connect the SAE plug with the compressor and you are ready to pump air in your tyre.
From the same webshop, I also bought a light weight aluminum tyre lever set because of its compact size and small weight.
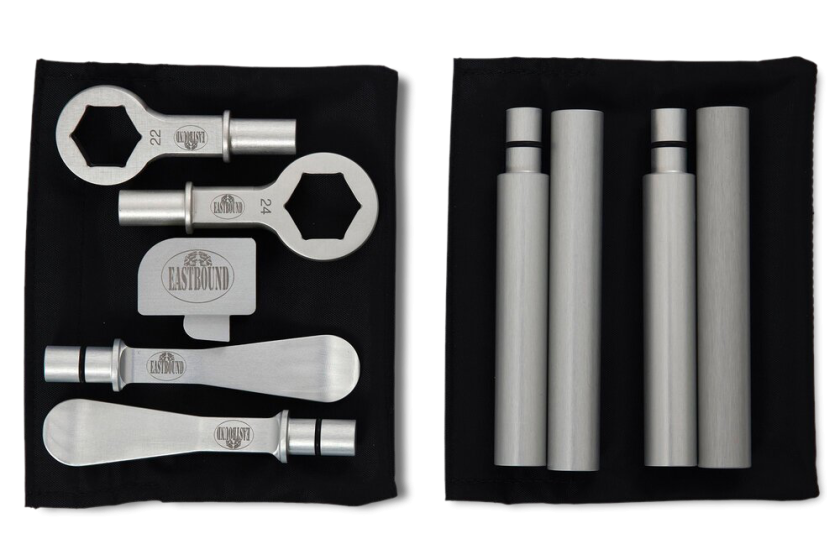
Another handy tool I got from here is the Wheel Wedge. When you re-install a rear tyre by yourself, you are basically just one hand short. I use this tool to lift up the tyre just enough so I have one free hand to place the axle back in place. The tool itself is small and light, and it’s just a matter of attaching the tyre levers to it.
Safe drinking water
In many countries it’s not safe to drink tapwater. Buying plastic water bottles every day is both bad for the environment and is time consuming! That’s why I bought a Steripen. This little UV water purifier device can purify up to 8,000 liters of water!
In case of real muddy water, you’d require an additional water filter to filter out the particles. Since I don’t go camping nor find myself out in the bush for long periods of time, I’m not likely to encounter that type of water. So for me, the steripen alone is enough to get me clean drinking water.
Stay safe, dress well and make great video recordings
That’s it. My most valued equipment for riding around the world on a motorcycle. To see what modifications I made on my Royal Enfield Himalayan, read my previous blogpost.
